Table of Contents
- Automating Email Notifications in SharePoint (Create & Test a Rule)
- Send Email Alerts When an Associate Is Assigned in SharePoint
- Creating and Testing a Power Automate Flow from SharePoint
- Posting Microsoft Teams Notifications from SharePoint Using Power Automate
- Automatically Upload Email Attachments to a SharePoint Document Library
Automating Email Notifications in SharePoint (Create & Test a Rule)
In this section, you’ll learn how to create a simple automation rule in SharePoint that sends an email whenever a new item is added to a list. This is especially useful for tracking new customers, support tickets, requests, or any important entries.
Instead of manually checking your list for updates, SharePoint can automatically notify you. 🚀
🔔 Why Use Automation Rules?
Automation rules in SharePoint help you:
- 📩 Receive instant email notifications
- ⏳ Reduce manual follow-ups
- 👀 Stay informed about important changes
- ⚙️ Turn rules on or off anytime
- 🛠 Manage rules easily from one place
In this example, we’ll set up a rule that sends an email whenever a new customer is added to a Customers list.
Video Explanation
🛠️ Create an Automation Rule (Item Created)
Automation rules are created directly from the list where you want the trigger to happen.
Step-by-Step Instructions
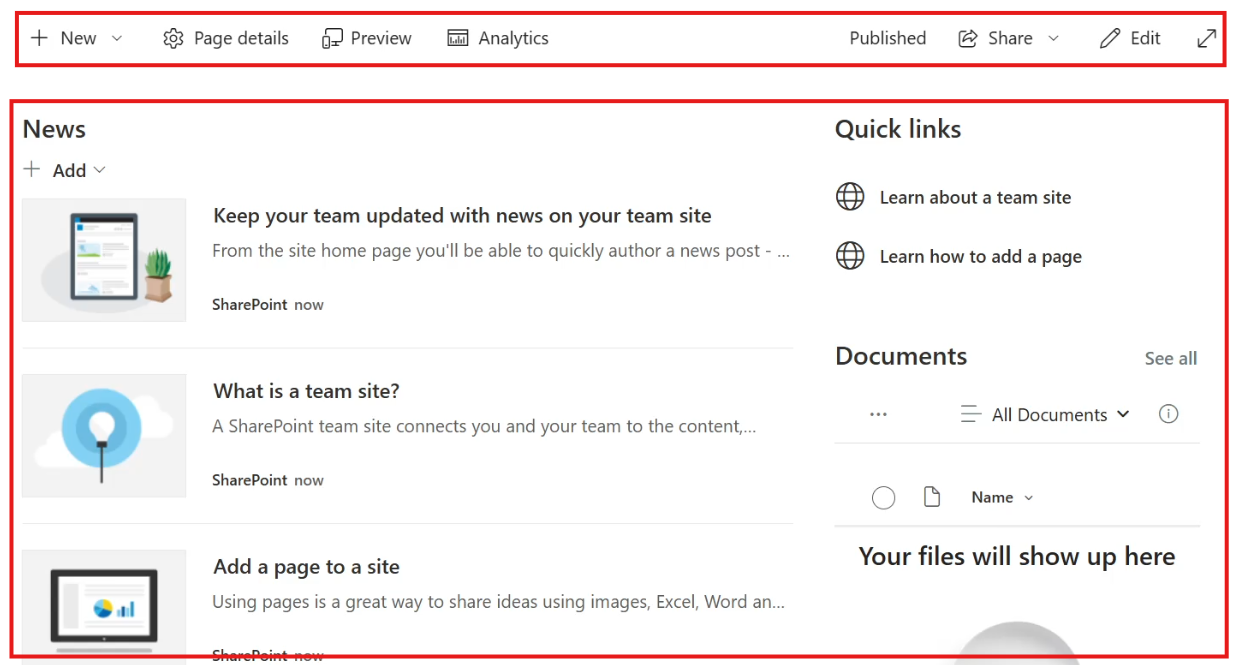
- Open your SharePoint list (e.g., Customers).
- At the top menu, click Automate.
- Select Rules from the dropdown.
- Click Create a rule.
You will see three rule options:
| Rule Type | When It Triggers |
|---|---|
| 🆕 Item Created | When a new item is added |
| ✏️ Item Modified | When an existing item is changed |
| 🗑 Item Deleted | When an item is removed |
- Choose Item Created.
- Select who should receive the notification (e.g., yourself or another team member).
- (Optional) Add a custom message.
- Click Create.
✅ Your rule is now active.
You’ll see:
- A short description of the rule
- A toggle switch to turn it ON/OFF
- The ability to manage it later via Automate → Manage Rules
This gives you full control over your notifications.
🧪 Test the Automation Rule
Now that the rule is created, let’s confirm it works.
Add a New Item
- Go to your list.
- Click Add New Item.
- Fill out all required fields.
- Click Save.
The moment you save the new entry, SharePoint triggers the rule.
📬 Verify the Email Notification
- Open your Outlook (or email client).
- Check your inbox.
You should receive:
- A notification email
- Details about the newly created item
- A link to open the list item directly
🎉 If the email arrives, your automation is working perfectly.
🔄 Managing Your Rules Later
You can always:
- Edit the rule
- Disable it temporarily
- Delete it completely
To do this:
- Go to Automate → Manage Rules
This makes it easy to adjust automation as your workflow evolves.
✅ Quick Recap
- Automation rules help you stay updated automatically
- You can trigger notifications for created, modified, or deleted items
- Rules can be enabled, disabled, or edited anytime
- Testing confirms everything is working as expected
By using SharePoint automation rules, you make your lists smarter and your workflow more efficient. 🚀
Send Email Alerts When an Associate Is Assigned in SharePoint
In this section, you’ll learn how to automatically notify an employee when they are assigned to a customer in a SharePoint list. This is a practical real-world scenario where responsibility changes need to be communicated immediately.
Instead of manually informing associates when they are assigned to a customer, SharePoint can handle this automatically using built-in automation rules. 🚀
🎯 Why This Rule Is Useful
When working with a Customers list, you may have a column called Associate (Person or Group type).
If someone changes the associate assigned to a customer:
- 📩 The new associate needs to know immediately
- ⏳ You avoid delays in task ownership
- 🔄 Responsibility transitions smoothly
- 👀 No one misses important assignments
This rule ensures that whenever the Associate field changes, the new associate receives an automatic email notification.
Video Explanation
🛠️ Create a Rule for “Item Modified” (Associate Field Change)
To notify associates when they are assigned to a customer, we need to create a rule that triggers when the Associate column is modified.
Step-by-Step Instructions
- Open your SharePoint list (e.g., Customers).
- Click Automate in the top menu.
- Select Rules.
- Click Create a rule.
- Choose Item Modified.
You will now configure the condition.
⚙️ Configure the Trigger Condition
After selecting Item Modified, you’ll be asked which column change should trigger the alert.
- Select the Associate column from the dropdown.
- Set the condition so that the rule triggers when:
- The Associate value changes (to any new value).
💡 You do NOT need to specify a particular name.
The goal is to notify whoever becomes the new associate.
📩 Configure the Email Notification
Next, set up who should receive the notification.
- Choose to notify the Associate column value (the new assigned person).
- Add a custom message if desired.
Example custom message:
“You have been reassigned to this customer.”
This makes the email clearer and more professional.
Finally:
- Click Create.
✅ Your rule is now active.
🧪 Test the Rule
To confirm everything works:
- Open a customer item.
- Click Edit.
- Change the Associate field to another user.
- Click Save.
Now check the newly assigned associate’s email inbox.
📬 They should receive:
- An email notification
- The name of the customer
- Your custom message
- A link to the list item
If the email arrives, your automation is working perfectly.
🔍 What This Rule Achieves
| Scenario | Result |
|---|---|
| Associate is reassigned | New associate gets notified |
| Responsibility changes | No manual follow-up needed |
| Customer ownership updates | Immediate awareness |
✅ Quick Recap
- Use Item Modified rules for field change notifications
- Select the Associate column as the trigger
- Notify the new value (the new associate)
- Add a custom message for clarity
- Test by editing the list item
By using this automation, you ensure that team members are instantly informed when they are assigned new responsibilities — improving accountability and workflow efficiency. 🚀
Creating and Testing a Power Automate Flow from SharePoint
In this section, we’ll walk through how to create a Power Automate flow directly from a SharePoint list and use it to send automatic email notifications. While SharePoint has built-in automation rules, Power Automate provides much more flexibility and allows you to build advanced workflows that connect multiple Microsoft services.
For example, you can automatically notify employees, start approval processes, update records, or integrate with other Microsoft 365 tools when something happens in your SharePoint list.
In this example, we’ll create a flow that sends an email to the assigned associate whenever a new customer is added to a SharePoint list.
🔑 Key Things to Know
- ⚡ Power Automate flows provide more advanced automation than built-in SharePoint rules.
- 🔗 Flows can connect SharePoint, Outlook, Teams, and many other services.
- 📧 You can automatically notify employees when list items are created or updated.
- 🤖 Automation reduces manual communication and improves workflow efficiency.
Video Explanation
Navigating to Power Automate from SharePoint
To start creating a flow, you can launch Power Automate directly from your SharePoint list.
SharePoint includes built-in templates that make it easy to create common automations without building everything from scratch.
Steps to Start a Flow from SharePoint
- Open your SharePoint list.
- In the top menu, click Integrate.
- Select Power Automate.
- Click Create a flow.
You’ll now see several Power Automate templates.
For this example, select:
📧 Send a customized email when a new SharePoint list item is created
Once selected, the Power Automate portal opens at:
https://make.powerautomate.com
This is the main environment used to create and manage flows.
Connectors Used in the Flow
When the template loads, it shows the connectors used by the flow.
| Connector | Purpose |
|---|---|
| SharePoint | Detect when a new list item is created |
| Office 365 Users | Retrieve user profile details |
| Office 365 Outlook | Send email notifications |
Click Create flow to continue.
Understanding the Flow Structure
After creating the flow, you’ll enter the Power Automate designer, which displays a visual workflow canvas.
The template includes three main steps:
1️⃣ Trigger
When a new item is created in SharePoint.
2️⃣ Action
Get my profile (V2) from Office 365 Users.
3️⃣ Action
Send an email (V2) from Office 365 Outlook.
When you click any step, a configuration panel appears where you can adjust its settings.
You’ll also notice that the Site Address and List Name fields are already populated.
This happens because the flow was launched directly from the SharePoint list.
For example:
- Site Address: Your SharePoint site
- List Name: Customers
This helps reduce manual setup.
Editing the Power Automate Flow
Next, we’ll customize the email that gets sent when a new customer is added.
Configure the Email Recipient
- Click the Send an email action.
- Locate the To field.
We want the email to be sent to the Associate assigned to the customer.
To insert values from the SharePoint item:
- Click inside the To field.
- Type / (forward slash).
- Select Insert dynamic content.
You’ll see a list of fields from the SharePoint list.
Choose:
📧 Associate Email
Now the email will be sent to the associate responsible for that customer.
Configure the Email Subject
Next, we’ll create a dynamic subject line.
Example goal:
A new customer, John, has been added.
Steps:
- In the Subject field, type:
A new customer,
- Type /.
- Select Insert dynamic content.
- Choose First Name.
- Add the text:
has been added
Now the subject will automatically include the customer’s name.
Configure the Email Body
Next, we’ll create the email body.
You can combine regular text with dynamic fields from the SharePoint item.
Useful fields include:
- First Name
- Last Name
This allows the associate to see customer details directly in the email.
Add a Direct Link to the Item
It’s helpful to include a link to the SharePoint record.
Steps:
- In the Body field, type /.
- Select Insert dynamic content.
- Choose Link to item.
This creates a clickable link that opens the customer record directly.
Remove an Unnecessary Step
The template includes an additional step:
⚙️ Get my profile (V2)
In this scenario, it isn’t required.
To remove it:
- Click Get my profile (V2).
- Open the three-dot menu.
- Select Delete.
Your flow now contains two steps:
| Step | Purpose |
|---|---|
| SharePoint Trigger | Runs when a new item is created |
| Send Email Action | Sends notification to the associate |
Click Save to store the flow.
Testing the Power Automate Flow
Now let’s verify that the automation works.
Add a New Customer
- Go to your Customers list.
- Click Add new item.
- Fill in the customer details.
In the form, you’ll see a field called Associate.
Select the employee responsible for the customer.
For example:
👤 Oba
Then click Save.
The new customer is now added to the list.
What Happens Next?
As soon as the item is created:
⚡ The Power Automate trigger runs
📧 An email notification is sent to the assigned associate
The email is sent using the connection of the logged-in user, so it appears as sent from your account.
Check the Associate’s Inbox
When the associate logs into Outlook, they will see the email notification.
The email includes:
- Customer First Name
- Customer Last Name
- Customer Email
- A direct link to the SharePoint item
Instead of placeholders, the email shows the actual values from the SharePoint list item.
Open the Customer Record from the Email
Inside the email, click the Link to item.
This opens the SharePoint page for the newly created customer.
You’ll be taken directly to the customer details view.
This confirms that the Power Automate flow is working correctly.
✅ What This Automation Achieves
| Benefit | Description |
|---|---|
| Instant notifications | Associates are notified immediately when a customer is assigned |
| Reduced manual work | No need to manually inform team members |
| Faster response | Employees can access the customer record directly |
| Better collaboration | Teams stay informed automatically |
Using SharePoint together with Power Automate helps streamline processes and keep your team informed with minimal effort. 🚀
Posting Microsoft Teams Notifications from SharePoint Using Power Automate
In this section, we’ll extend our SharePoint automation by integrating Microsoft Teams notifications using Power Automate. Previously, we created a flow that sends an email notification when a new customer is added to a SharePoint list. While email notifications are useful, many teams rely on Microsoft Teams for daily communication and collaboration.
By posting messages directly to a Teams channel, important updates become visible to the whole team instantly. This approach ensures that employees stay informed without constantly checking emails.
For this example, when a new customer is added to the SharePoint list, the assigned associate will receive:
- 📧 An email notification
- 💬 A message in a Microsoft Teams channel
This combination helps improve visibility and collaboration across the team.
🔑 What This Automation Achieves
| Feature | Benefit |
|---|---|
| 💬 Teams Channel Notification | Team members see updates instantly |
| 📧 Email Notification | Associates receive direct alerts |
| ⚡ Automated Workflow | No manual communication required |
| 🔗 Dynamic Data | Messages include real customer information |
Video Explanation
Login to Microsoft Teams and Create a Channel
Before sending notifications to Teams, we first need a channel where the automated messages will be posted.
A Team in Microsoft Teams can contain multiple channels, which are used to organize discussions and updates.
In this scenario, we’ll create a dedicated channel called Announcements where customer notifications will appear.
Steps to Create a Teams Channel
- Open your browser and go to office.com.
- Sign in with your Microsoft 365 account.
- From the list of applications, click Microsoft Teams.
- Once Teams opens, locate the Team associated with your SharePoint site (for example, Test Site).
- Hover over the team name and click the three-dot menu.
- Select Add channel.
- Enter the following details:
| Field | Value |
|---|---|
| Channel Name | Announcements |
| Channel Type | Standard |
- Click Create.
🎉 The new Announcements channel is now ready.
This channel will be used to display automated notifications whenever a new customer is added to the SharePoint list.
Create a Power Automate Flow to Post in a Teams Channel
Now that the Teams channel exists, we can update our Power Automate flow so it sends a message to that channel.
Instead of building a completely new flow, we’ll edit the existing flow that already sends an email notification.
This allows us to reuse the same automation and simply add another action.
Steps to Modify the Flow
- Open the Power Automate portal
👉make.powerautomate.com - Sign in using your Microsoft 365 account.
- Navigate to My Flows.
- Locate the flow named Notify Associate Flow.
- Click the flow and select Edit.
You’ll now see the flow designer with the existing steps.
Existing Flow Structure
| Step | Type |
|---|---|
| When a new item is created | SharePoint Trigger |
| Send an email | Outlook Action |
Next, we’ll add a new step to send a Teams message.
Add the Microsoft Teams Action
- Click the ➕ Add action button below the email step.
- In the search box, type Microsoft Teams.
- Select the action:
💬 Post a message in a chat or channel
Once added, we need to configure it.
Configure the Teams Message
Fill in the fields as follows:
| Field | Value |
|---|---|
| Post as | Flow bot |
| Post in | Channel |
| Team | Test Site |
| Channel | Announcements |
Now configure the message that will be posted.
Instead of writing a static message, we’ll insert dynamic content so the message includes real customer information.
Insert Dynamic Content
- Click inside the Message field.
- Type
/to open the quick insert menu. - Select Insert dynamic content.
Add the following fields:
- Associate Display Name
- First Name
Example Message Format
Kudos! [Associate Display Name] has been assigned a new customer, [First Name].
Example output:
Kudos! Oba has been assigned a new customer, John.
Now the message automatically updates based on the customer and associate involved.
Final Flow Structure
Your completed flow now contains three steps:
| Step | Description |
|---|---|
| SharePoint Trigger | Runs when a new item is created |
| Email Action | Sends notification email |
| Teams Action | Posts message in Teams channel |
Click Save to store the updated flow.
Test the Power Automate Flow
Now let’s verify that the automation works correctly.
Steps to Test the Flow
- Open the Customers list in SharePoint.
- Click Add new item.
- Enter customer details.
Example:
| Field | Value |
|---|---|
| Customer Name | Tony |
| Associate | Oba |
- Complete any required fields.
- Click Save.
The new customer is now added to the list.
Verify the Flow Execution
Next, confirm that the flow ran successfully.
- Open Power Automate.
- Navigate to My Flows.
- Click Notify Associate Flow.
On the Flow Overview page, check the Run History.
You should see a recent run corresponding to the customer you just added.
Click the latest run.
If the automation worked correctly:
- ✅ All steps will show green check marks
- 📢 The status will display Flow run succeeded
Check the Teams Channel
Finally, open Microsoft Teams.
Navigate to the Announcements channel created earlier.
You should see the automated message posted by the flow.
Example:
Kudos! Oba has been assigned a new customer, Tony.
The message includes dynamic information pulled directly from the SharePoint list item.
✅ Result
With this automation in place:
- 📧 The associate receives an email notification
- 💬 A Teams message appears in the Announcements channel
- ⚡ The workflow runs automatically whenever a customer is added
This ensures that team members are immediately informed about new customer assignments, improving visibility and collaboration across the organization. 🚀
Automatically Upload Email Attachments to a SharePoint Document Library
In many organizations, important files are often sent through email. Manually downloading these attachments and uploading them to SharePoint can be time-consuming and prone to errors.
In this section, we’ll set up an automation that automatically saves email attachments into a SharePoint document library. 📩➡️📁
Once configured, whenever someone sends an email with an attachment to a specific mailbox, the file will automatically appear in the SharePoint library. This is useful for scenarios such as:
- 📊 Collecting financial or operational reports
- 📄 Receiving documents from team members
- 📥 Automatically storing files submitted via email
- 🗂 Centralizing documents in a SharePoint library
To achieve this, we will:
- Create a document library where the files will be stored
- Build a Power Automate flow that listens for incoming emails
- Configure the flow to save attachments to SharePoint
- Test the automation to confirm everything works correctly
Video Explanation
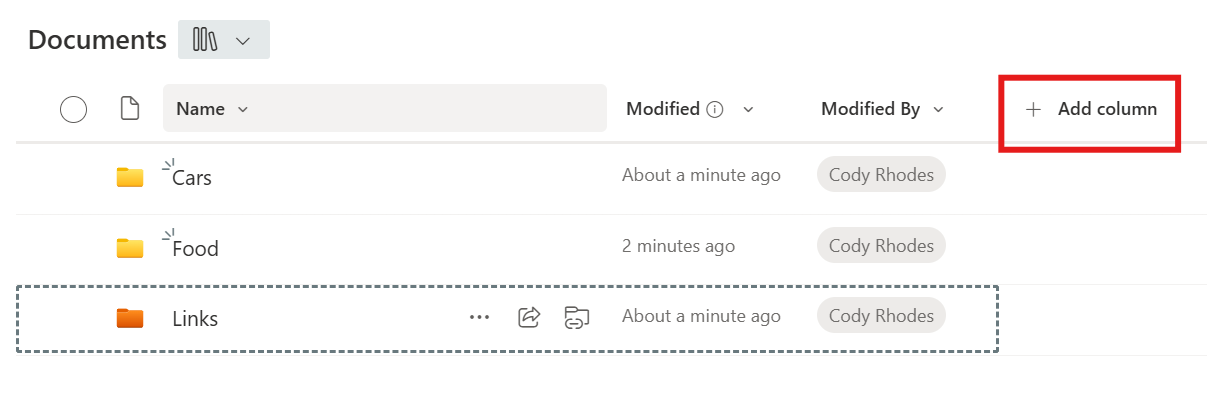
📁 Create a Document Library for Email Attachments
Before building the automation, we first need a document library where the files will be stored.
A SharePoint document library is a location where documents can be stored, organized, and shared within a site.
Steps to create the library
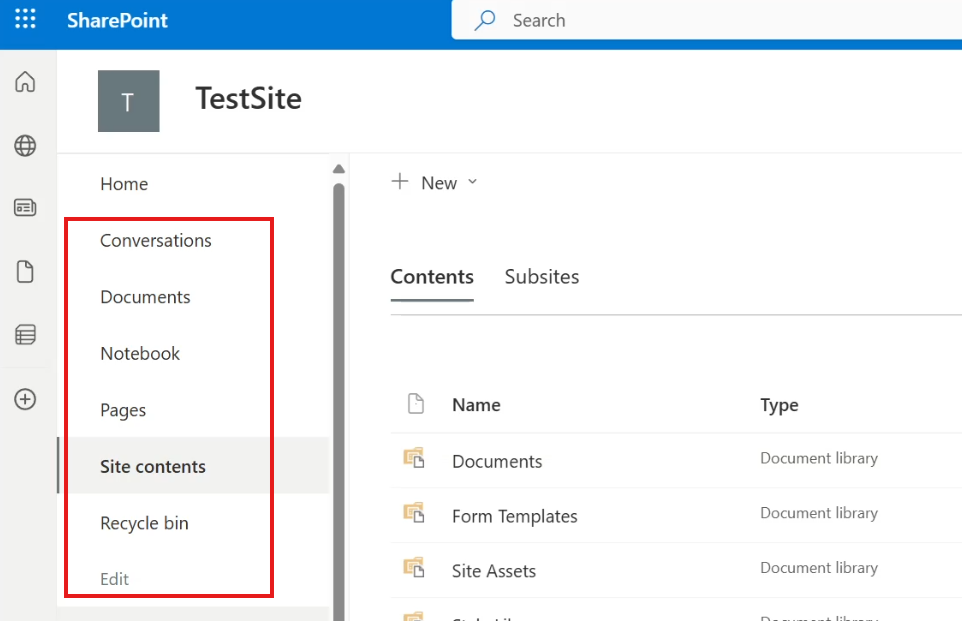
- Open your SharePoint site.
- Click Site contents from the navigation menu.
- At the top of the page, click New ➜ Document library.
- Select Blank library.
- Enter the following details:
| Setting | Value |
|---|---|
| Library Name | Reports |
| Description | Financial reports submitted by email |
- Click Create.
✅ The Reports document library is now ready.
At this point, it will appear empty, since no files have been uploaded yet.
In the next step, we will create a Power Automate flow that automatically uploads email attachments into this library.
⚙️ Create a Power Automate Flow
Now that the document library is ready, the next step is to create the automation workflow.
This workflow will start whenever a new email with an attachment arrives.
Steps to create the flow
- Open the Reports document library.
- Click Integrate in the top menu.
- Select Power Automate.
- Click See your flows.
This opens the Power Automate portal:
make.powerautomate.com
- Click New flow.
- Select Automated cloud flow.
Automated flows start automatically when a specific event occurs.
- Enter the flow name:
Email to Document Library
- Choose the trigger:
When a new email arrives (V3)
from Office 365 Outlook.
- Click Create.
Power Automate will now generate the flow with the selected trigger.
Next, we will configure how the email attachment gets saved to SharePoint.
🔧 Configure the Power Automate Workflow
Now we need to configure the trigger and add actions that upload the attachment.
Configure the email trigger
Click the trigger block When a new email arrives (V3).
Then configure the following settings:
| Parameter | Value |
|---|---|
| To | Cody’s email address |
| Include Attachments | Yes |
| Only with Attachments | Yes |
| Folder | Inbox |
This means the flow will run when:
- 📩 An email is sent to Cody
- 📎 The email contains an attachment
- 📥 The email arrives in the Inbox
(Optional) Add a debugging notification
During testing, it can be helpful to confirm that the trigger has executed.
You can add a debugging step that sends a Teams message.
Steps:
- Click Add a new action
- Search for Microsoft Teams
- Select Post a message in a chat or channel
Example message:
“An email with an attachment has been received.”
This message can be posted in a channel such as Flow Debug inside your Team.
⚠️ This step is optional and mainly used for debugging.
Add the action to upload the file to SharePoint
Now we add the main action that uploads the attachment.
- Click Add a new action
- Search for SharePoint
- Select Create file
Configure the following settings:
| Field | Value |
|---|---|
| Site Address | Test Site |
| Folder Path | Reports |
| File Name | Email Subject |
| File Content | Attachments Content |
💡 Important:
The email subject will become the file name in SharePoint.
Because of this, the sender should provide a meaningful subject line.
Example:
| Email Subject | File Name in SharePoint |
|---|---|
| Book One | Book One |
| Financial Report March | Financial Report March |
The attachment itself becomes the file content.
Once this action is configured, the automation logic is complete.
📌 Workflow summary:
| Step | Action |
|---|---|
| 1 | Email arrives with attachment |
| 2 | Flow is triggered |
| 3 | Attachment content is extracted |
| 4 | File is saved to the Reports document library |
🧪 Test the Automation
Now let’s confirm that the automation works correctly.
Steps to test
- Open your email client.
- Create a new email.
- In the To field, enter Cody’s email address.
- Attach a file.
Example attachment:
📊 Book One (Excel spreadsheet)
- Enter the subject:
Book One
- Send the email.
Verify the results
After sending the email:
- Wait a few seconds for Power Automate to process the message.
- Open the Reports document library in SharePoint.
You should now see the uploaded file.
✅ The file name will match the email subject.
✅ The file content will match the email attachment.
This confirms that the automation is working successfully.
📌 Result
With this automation in place:
📩 Sending an email with an attachment
⬇
⚙️ Power Automate processes the message
⬇
📁 The attachment is automatically uploaded to SharePoint
This approach helps organizations automatically collect and organize documents without manual uploads, making document management faster and more reliable.